
"Think Like a Raindrop"
Guidelines from Team Rubicon on how to prepare and repair your roof (Part 2 of 2)


At the May 27 City Council meeting, City Manager Stone James announced that a heavier than normal monsoon season was expected. With the tragic July 4 floods on our minds, and the anniversary of last year’s July 14 flood approaching, the Desert Trumpet is running guidelines from a workshop that Team Rubicon, held on July 28, 2024. At that workshop, the veteran-led disaster response organization shared insights on sandbagging and flood protection, which we published here, and roof repair and maintenance.
“Don’t just throw a tarp over the hole,” said Team Rubicon’s Kevin Kothlow. “Think like a raindrop. If you put a tarp down, how is it mitigating the rain?” Your roof is the part of your house most vulnerable to high winds and heavy rains. He explained in detail how residents can make temporary roof repairs that hold up to wind and rain—especially important in the Hi-Desert where building materials and rooflines vary widely.
Safety First
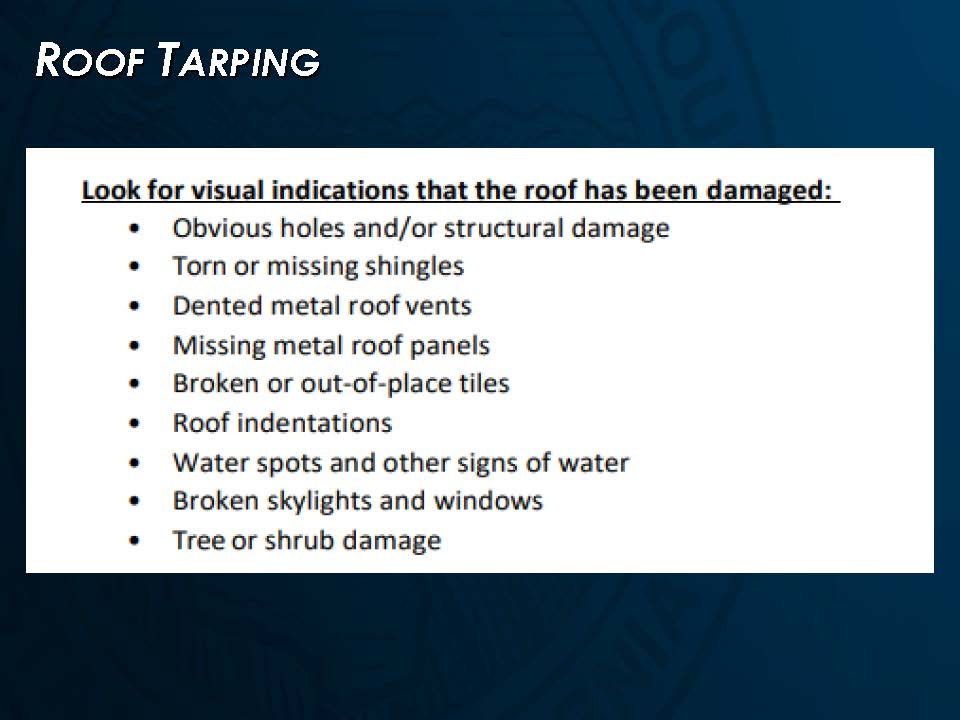
“Before you even get up on the roof, you’ve got to evaluate,” Kothlow said. “Is it still safe? Are there soft spots, pooling water, cracked tiles, or failing flashing?” He warned that rooftop A/C units and skylights are common sources of leaks.
James Coler added, “Flashings are huge leak areas. If you’ve got water coming in, check those first before blaming the roof.”
What You’ll Need
The team walked attendees through a DIY toolkit for roof repairs, including:
Heavy-duty tarp (larger than the hole)
1x2x8 furring strips
Duplex nails (easier to remove)
Hammer, staple gun, utility knife
Duct tape and optional thermal tape for vent sealing
“Don’t go cheap on the tarp,” Kothlow cautioned. “You might think you only need a 10x6, but when you think like a raindrop, you need to go over the peak and down the sides so water sheds away.”
How to Tarp a Roof
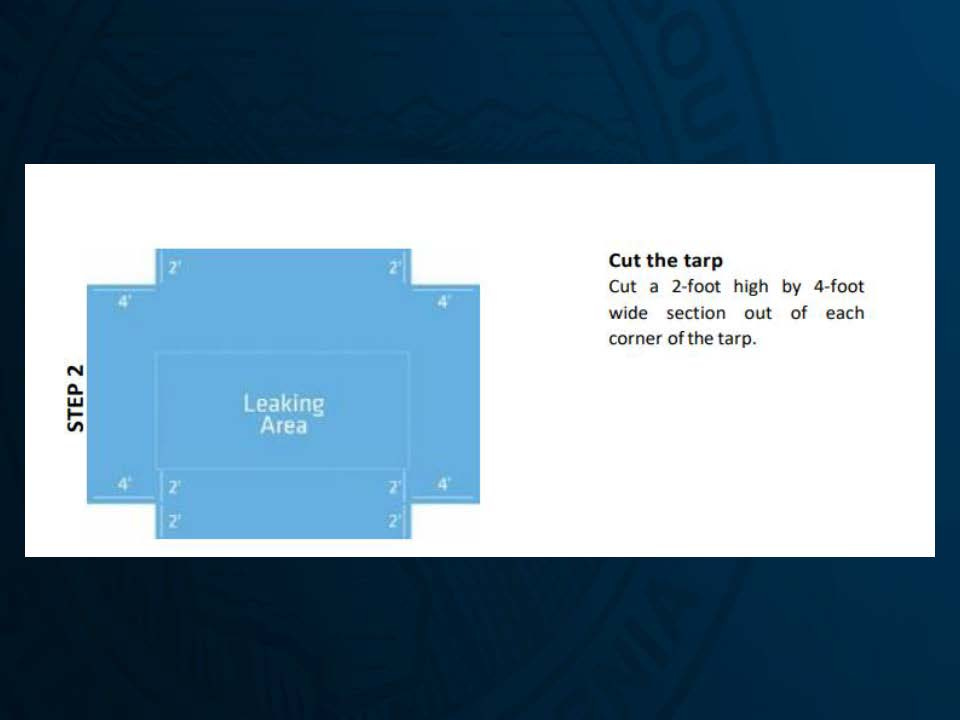
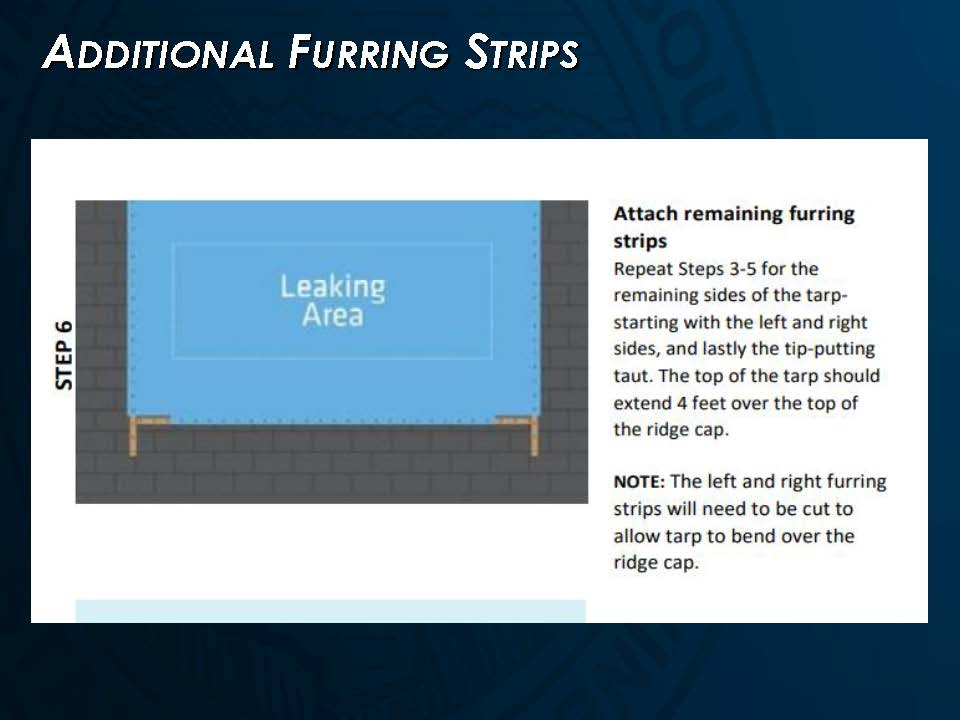
Once a roof has been safely assessed, the tarp needs to be cut generously—usually 4 feet wider than the damaged area on all sides. On pitched roofs, the tarp should go over the peak, not just the leak. Kothlow said, “always: measure twice. Cut once.”
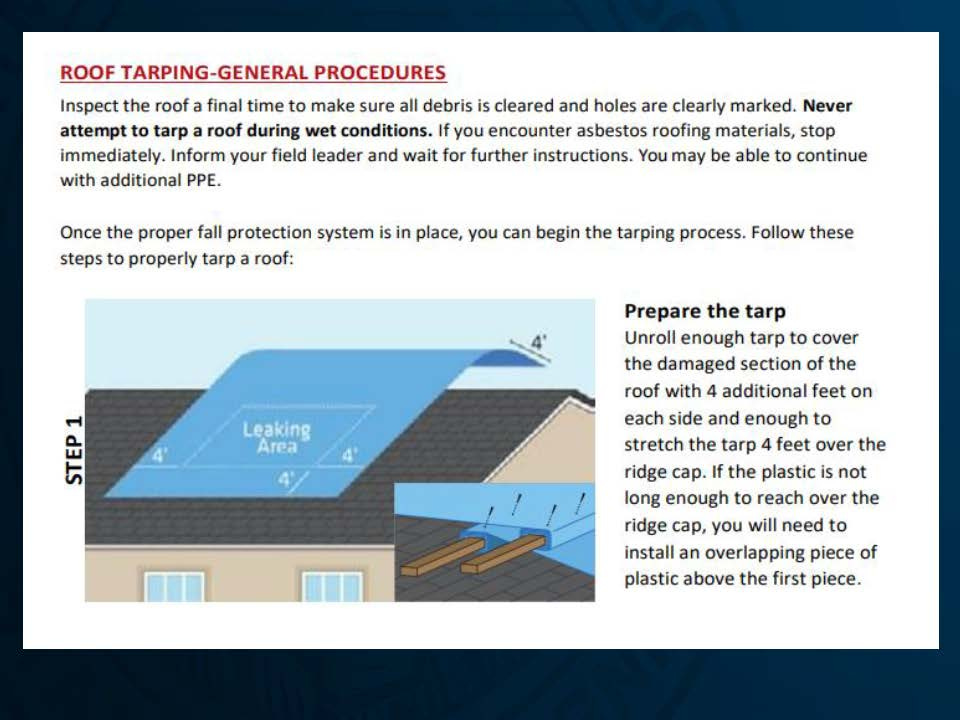
“You roll the furring strip into the edge of the tarp two or three times, like a burrito,” Kothlow explained. “Then nail it into the fascia or over the peak using duplex nails. Not pretty—just strong and tight enough so the wind won’t lift it.”
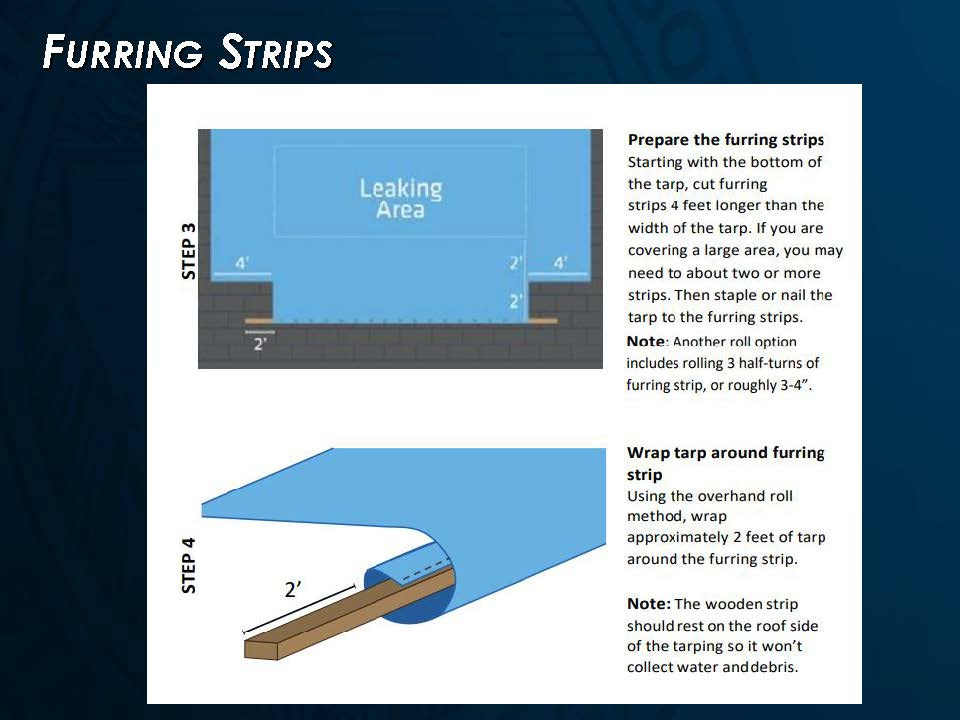
He emphasized that the goal isn’t aesthetics: “It’s a temporary fix, not a permanent one. Your roofer should be able to come in later, pull the furring strips, and see where the nails went in.”

For homes with flat or semi-flat roofs, Kothlow offered a variation: “Put the furring strip and tarp just over the high side or parapet wall. If you don’t have a parapet, attach to the fascia so you’re not adding holes to the roof itself.”
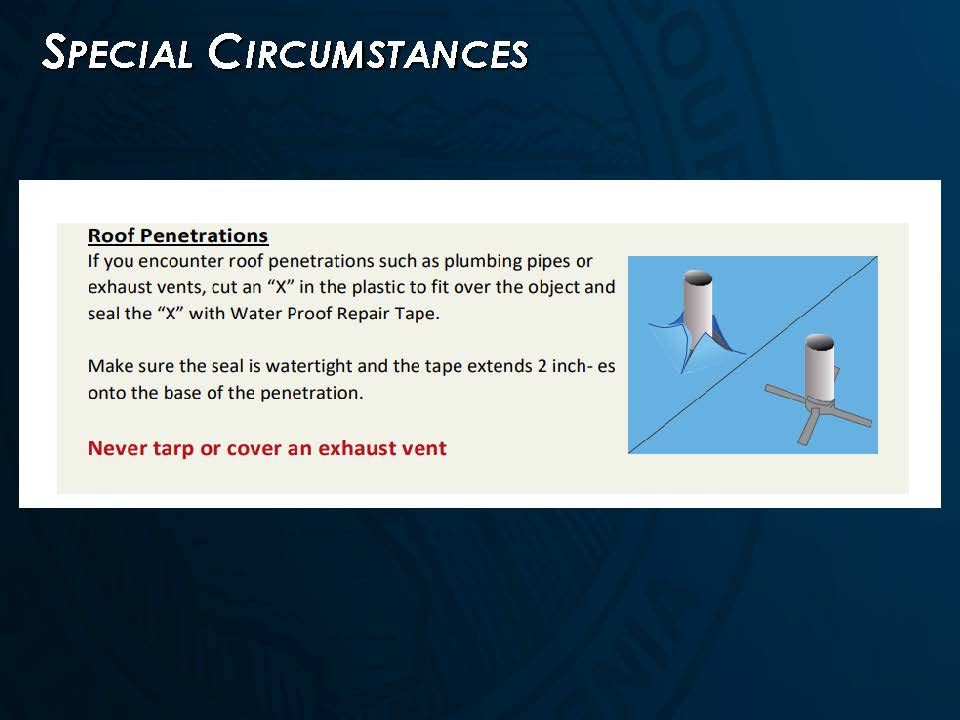
If a vent or AC pipe is in the way, Kothlow recommended using duct tape to mark the spot, then making a small cut in the tarp and carefully pulling it down over the obstruction. “Don’t cut too much,” he warned. “And if it’s a thermal pipe, don’t use regular duct tape—use thermal tape.”
He also shared a field trick: “Mark holes with duct tape so nobody steps into them later. Especially important in storm zones where trees or debris may have punched through.”
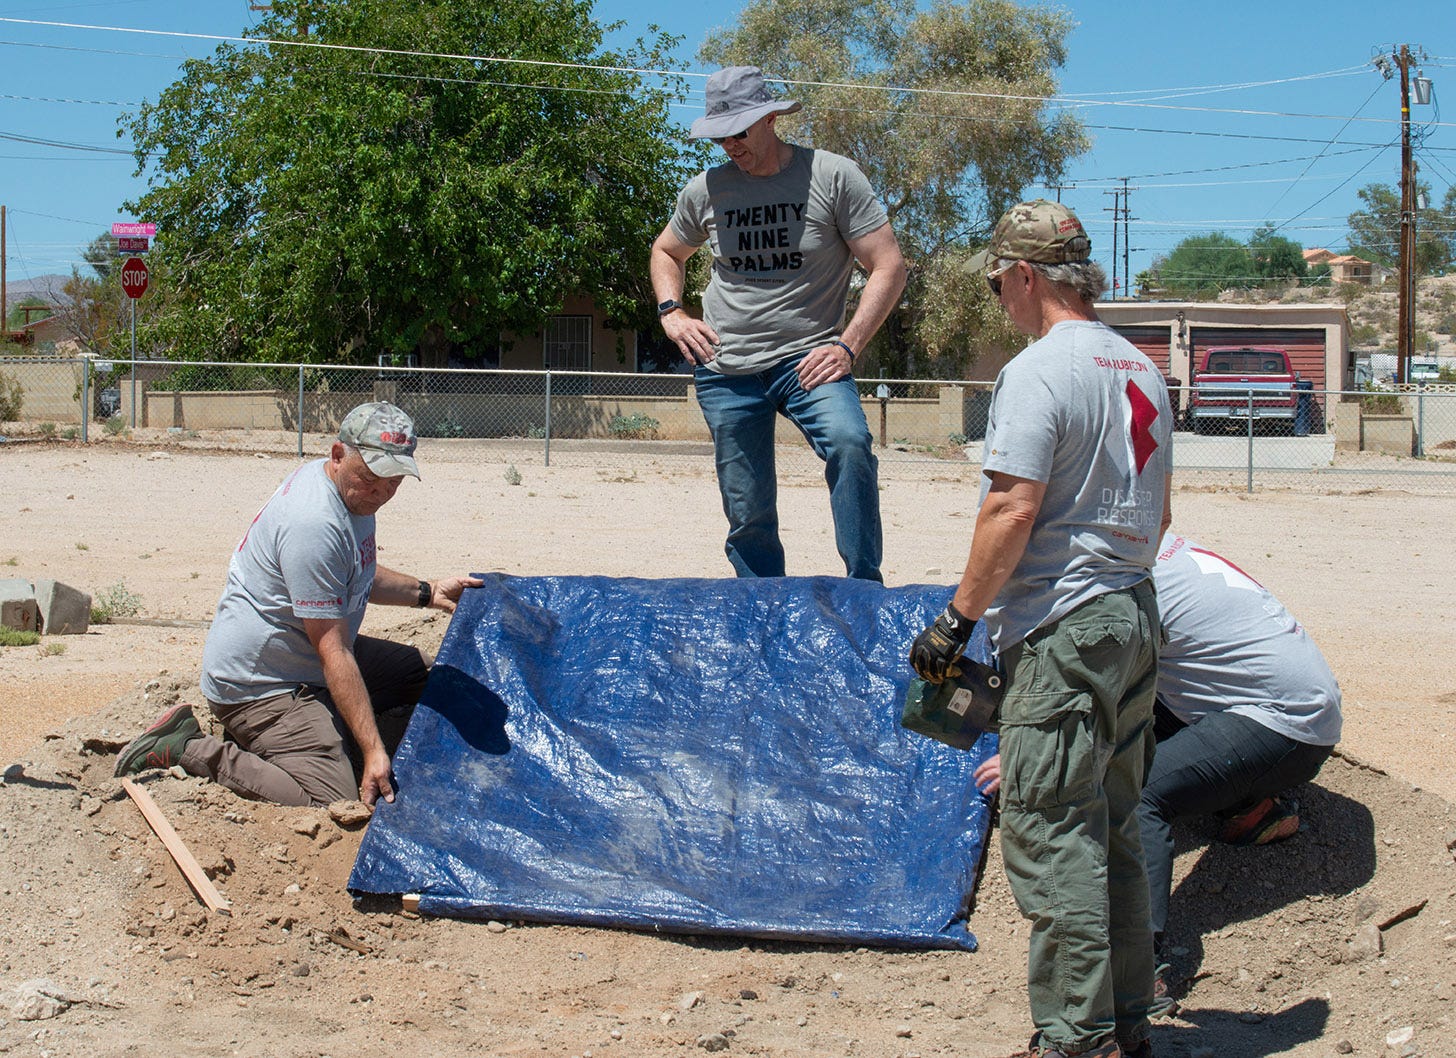
Putting it into Practice
After the talk, attendees moved across the street for a live demonstration on a dirt mound shaped like a roof. The group practiced rolling furring strips, securing tarps, and troubleshooting awkward angles.
“We’ve had these tarps stay on all hurricane season,” Kothlow said. “If you do it right, it’ll hold through a monsoon.”
Leave your thoughts in the comments below. Please note that we do not allow anonymous comments. Please be sure your first and last name is on your profile prior to commenting. Anonymous comments will be deleted.
Feel free to share this article!
Are you subscribed?
Help us reach our 2025 goal of $10,000 in subscriptions! Upgrade to a paid subscription for just $5 per month or $50 per year.